Some drawing tips previously posted on twitter.
More drawing tips on my patreon.
Hope some of these can be helpful.
hello i am here today to not lose track of the art cheats i have discovered over the years. what i call art cheat is actually a cool filter/coloring style/way to shade/etc. that singlehandedly makes art like 20 times better
adding colors to grayscale paintings
foreshortening ( perspective )
clipping group (lines)
clipping group (colors)
that is all for today, do stay tuned as i am always hunting for cool shit like this


This is how I make my cosplay swords! If there are any questions, or if anything isn’t clear, feel free to ask me anything.
The template I mentioned: sta.sh/21u4m1riua1s
((By the way, I’m going to Megacon next week!! I’ll be cosplaying as Alice Angel, Bendy, Vio Link, and Shadow Link!))
It’s #TutorialTuesday ✨
Ever made or worn a scarf for cosplay and it never sits right for photos so you’re ADJUSTING IT ALL DAY LONG?
Here’s how I cheat the system!
Make it sit right all the time, everytime with the Fabric Donut trick!Leave a comment!
#sewing #cosplay #scarf #fakescarf #tutorial
A tutorial as requested of the Furvilla fans!
It works fine with PaintToolSai and Photoshop or any program which has these features! This tut is for those with basic knowledge of the programs.
The layers can be seen in the last panel with the finished drawing! Please zoom in to see! Thank you for reading and I hope it sheds some light on my process!
Reblogging so I can have this for reference
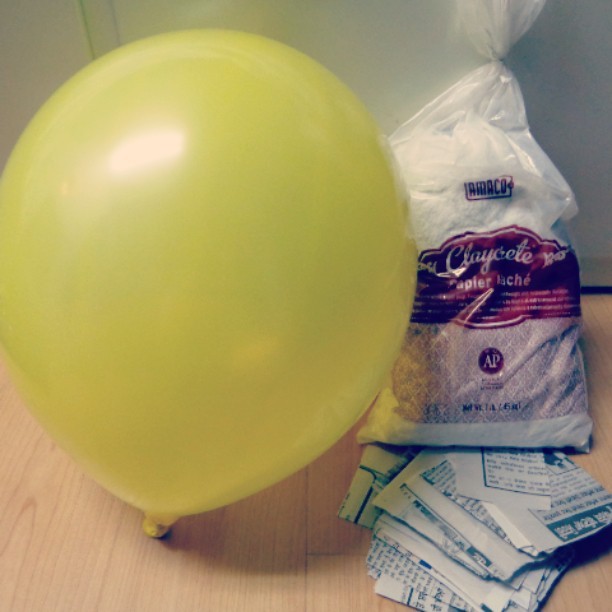
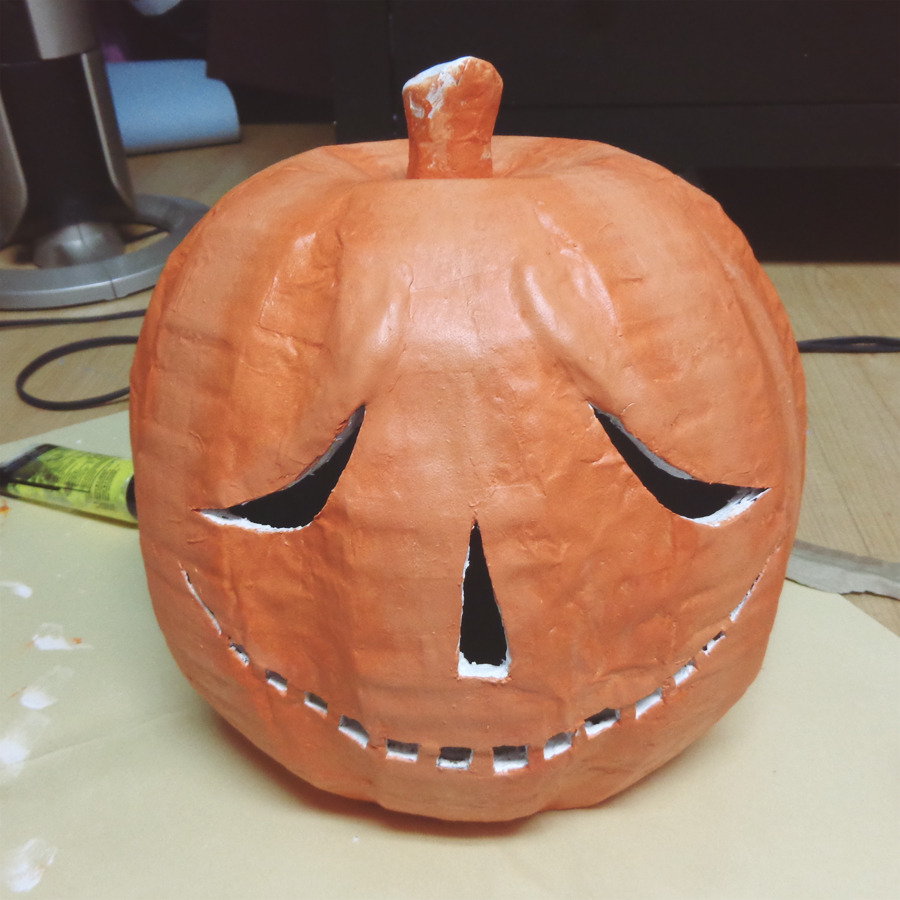
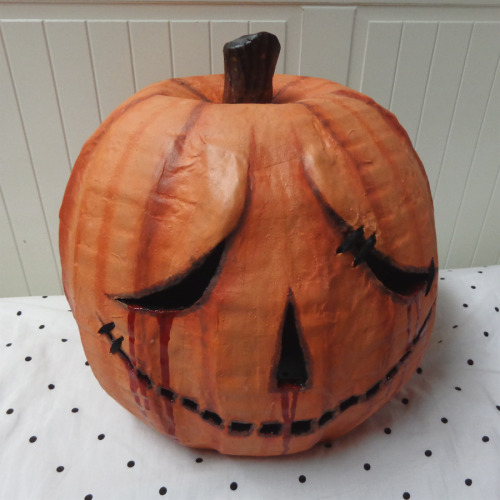
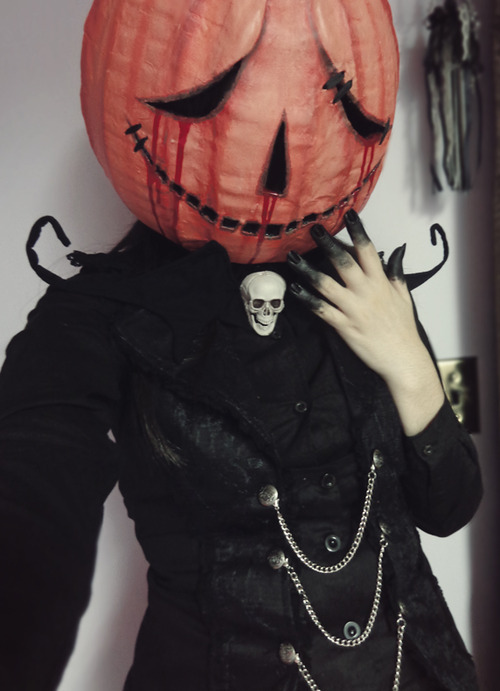
Since I defs didn’t want to carve a real pumpkin to put on my head and get nasts pumpkin insides all over my hair I decided to paper mache one. Unfortunately there was no good tutorials anywhere so I will share my trial and error knowledge.
First I got some supplies: 1 Punch balloon (they’re rounder and larger they regular balloons), some paper mache stuff in a bag, cardboard, a glue gun, paint, sculpey clay, tape, some news paper and some water and flour mixed together.
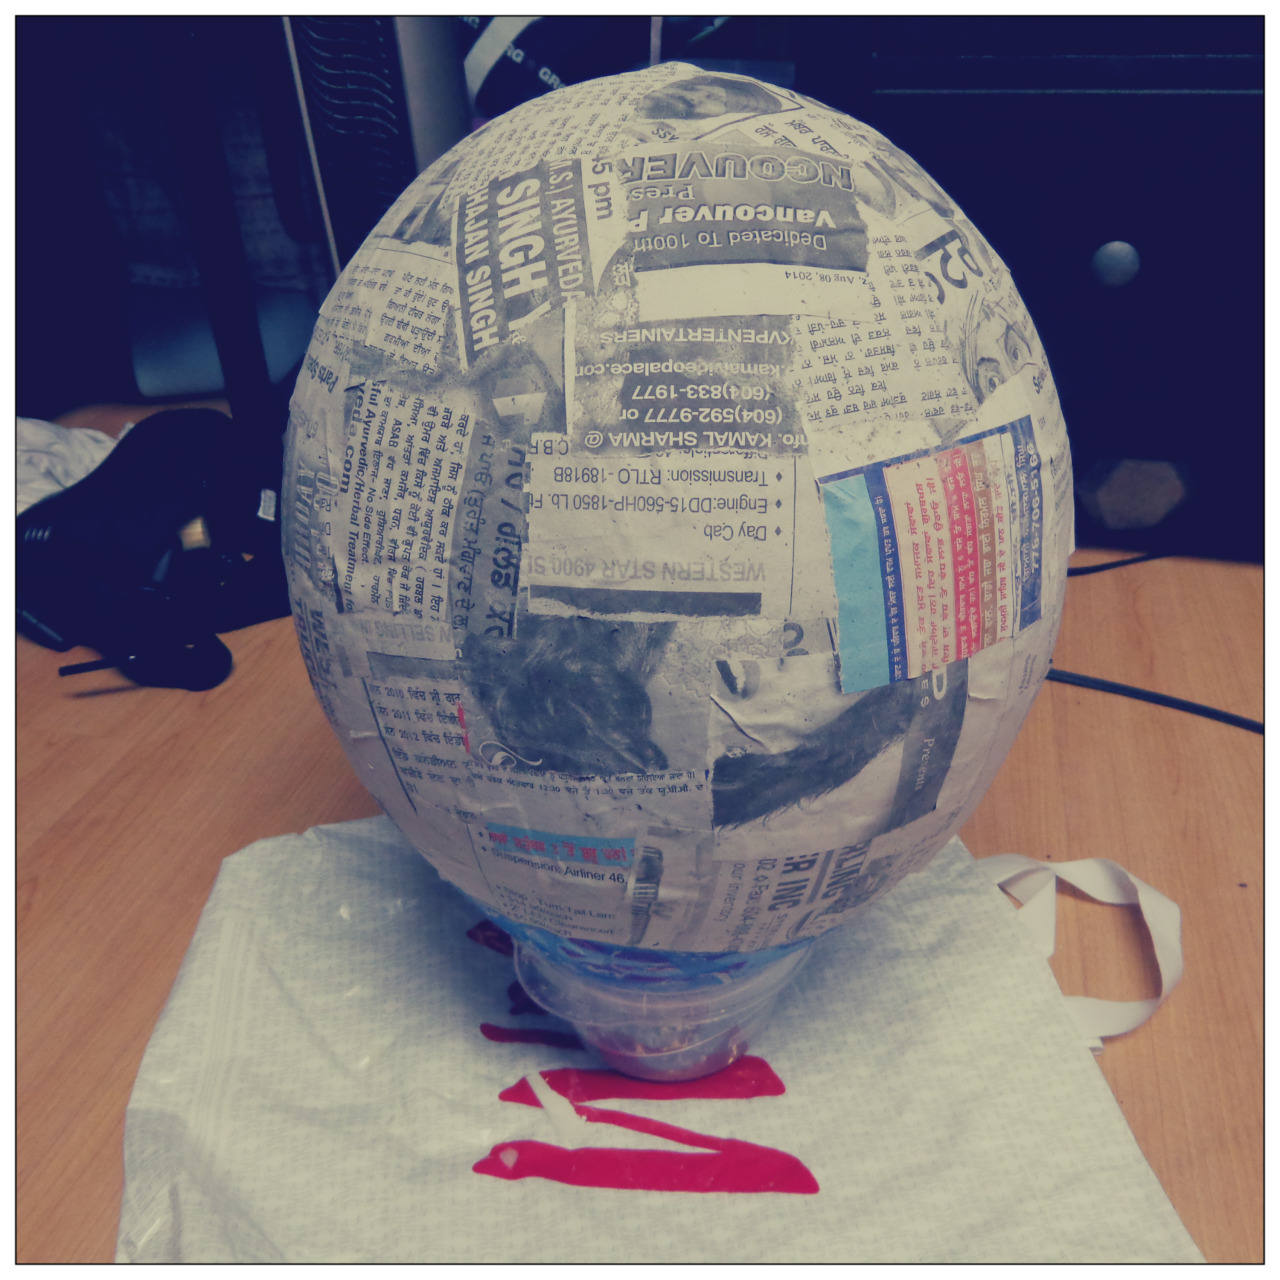
I then put at least three – five paper mache layers of newspaper with flour water on the balloon. I also measured my head and left an opening at the bottom. (NOTE: Don’t put tape on the balloon and try to peel it off after you’re done paper macheing, RIP)
After that’s all dry I put glue gunned some cardboard onto it to give it some pumpkin like ridges.
Then I filled the gaps between the cardboard and the newspaper with the paper mache in a bag stuff. Wait for it to dry. (Note: Don’t pop balloon until the paper mache in a bag stuff is dry cause it holds a LOT of water and your paper mache project will sink, RIP) After that I popped the balloon and lightly dampened the top with a sponge and water until it was wet enough to slowly press down into more of a pumpkin shape.
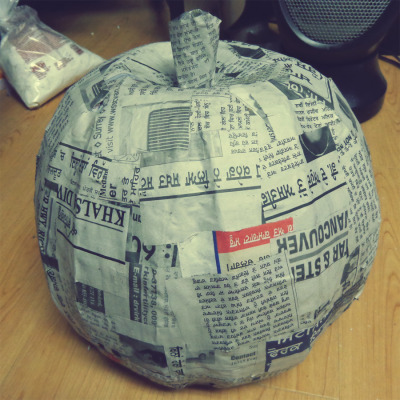
After it’s all dry I taped a stem I made out of card board on the top and put another layer or two of newspaper mache over top.
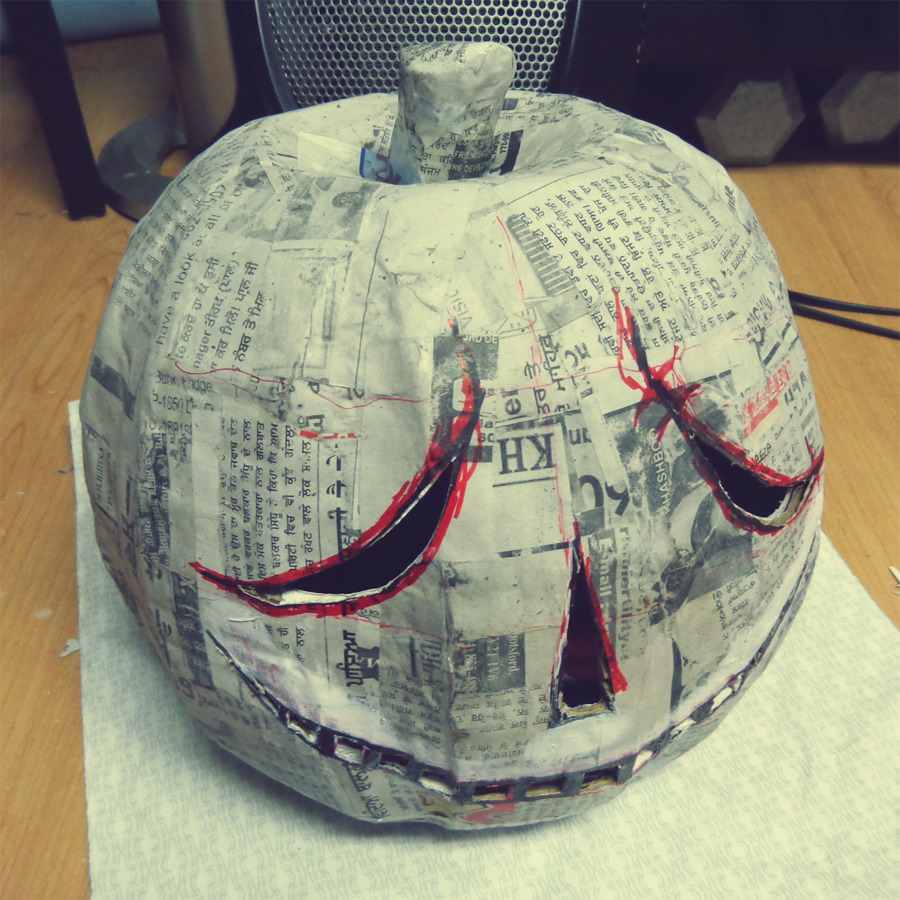
More drying wait time (you can use your oven on the lowest setting to make it dry faster) then I sanded it down and cut out a face with an exacto blade.
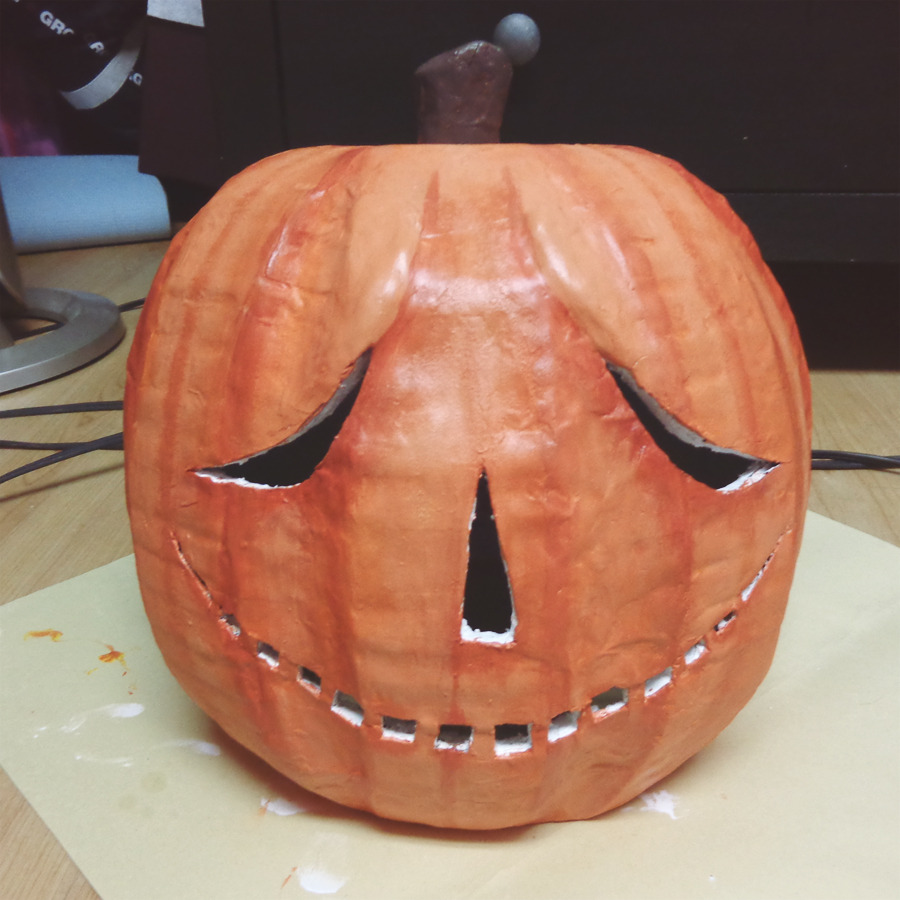
I added a little bit of backing behind the face on the inside with the paper mache in a bag to give it more of a 3D look which wasn’t that noticeable but oh well, it kidna worked… After all that stuffs done I painted it all white otherwise the newsprint would bleed through and make my colours not as bright, I also added some sculpey clay to the brow area to give it some more emotion in which I used an iron to dry it with cause it was too late to put it in the oven with paint all over it (Note: Put clay on before painting).
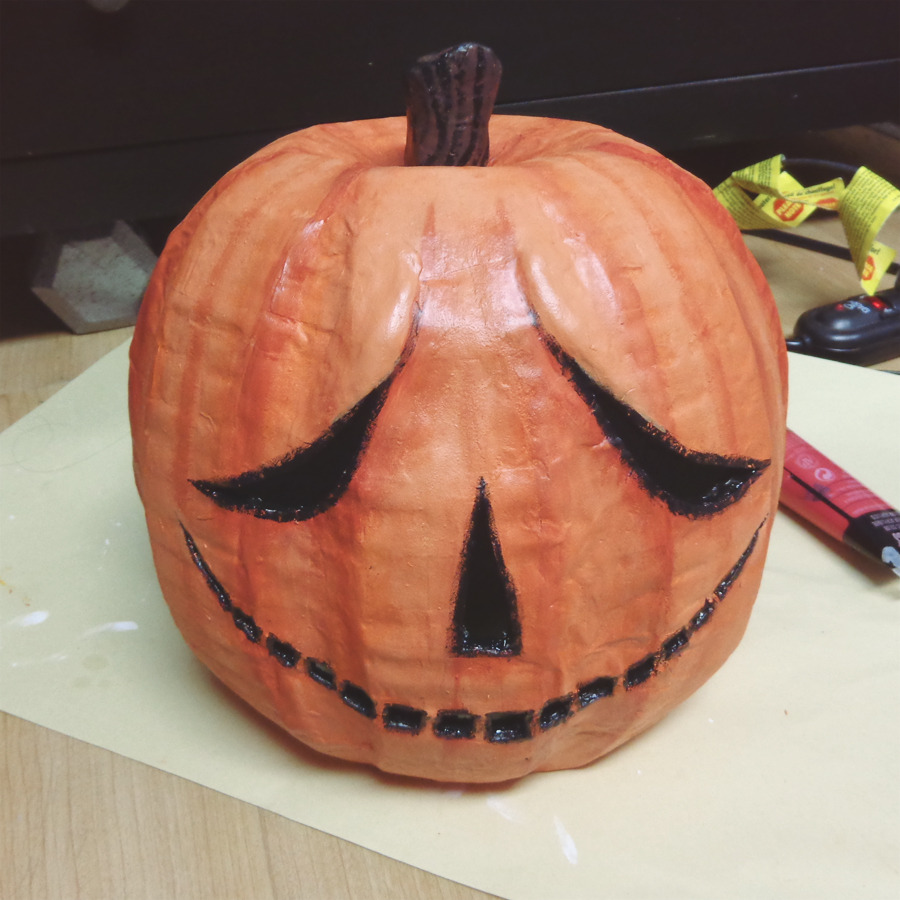
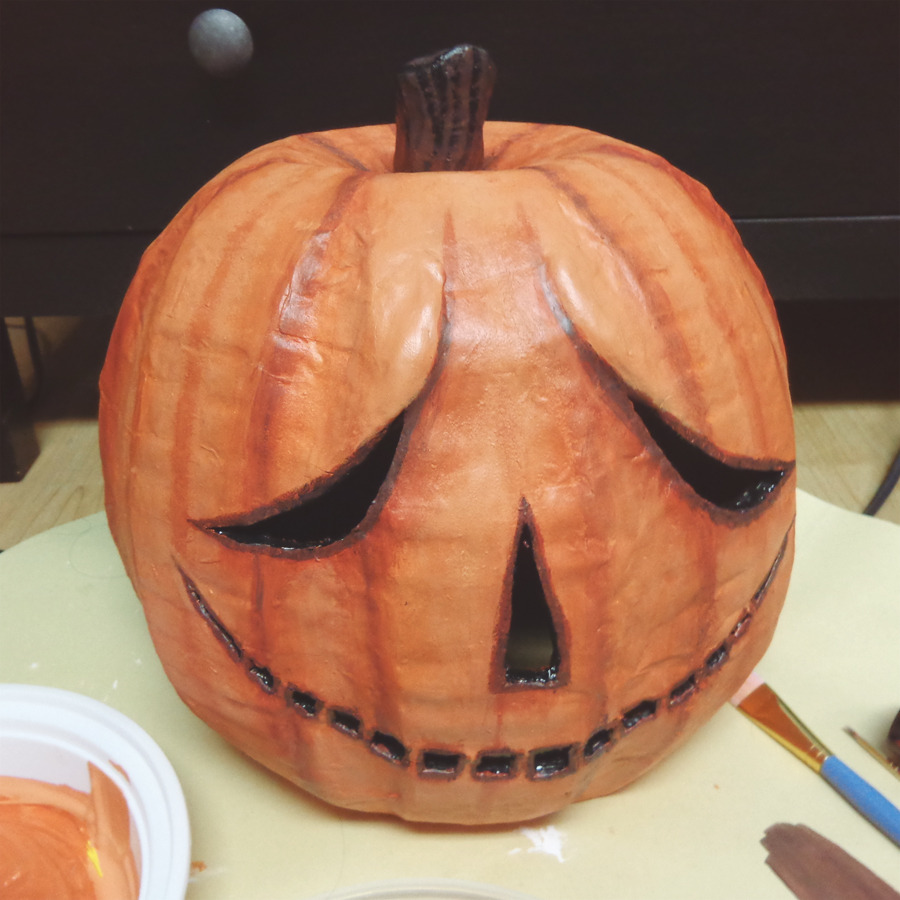
I sprayed it with a sealer before painting colours on it cause I find acrylics do weird things sometimes. After it was all dry I begin to paint.
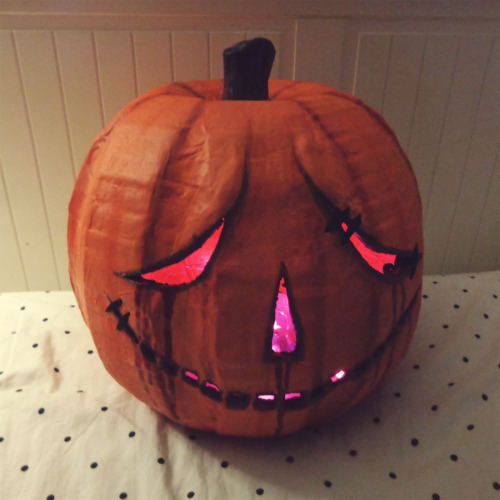
I also painted the inside a red and added a kinda head rest thing on the inside since when I pushed the top down it made an uncomfortable point at the top when putting it on your head. Then once it was all dry I sprayed it with some more sealer, added some cool stuff like stitches with some ribbon and blood which I used nail polish for a shiny effect and put in some lights which weren’t very effective when my head was in the pumpkin but that’s okay, it still looked cool.
And that’s that!
Hope this helps some people, Enjoy!
Yes!! Now heads will be rolling!
im gonna do this
- hundreds of pose references wowie
- how to draw profiles
- a guide to figure drawing (this helped me a hecka lot)
- drawing eyes
- lip tutorial
- how to draw jeans
- amaze color blender
- hands hands hands
- more hands
- torso reference
- wings
- painting blood
- how to draw shoes/feet
- psychology of color
- simple expression guide
- sitting poses
- more color psychology
- drawing hair and fur
- hecka lot of clothing refs
- pose reference blog
- another hand tutorial
- how to draw arms
- expression tutorial
- skin color palatte
- how to draw booties
- drawing ears
- hands at sides tutorial
- drawing heads
- guide to foreshortening
- drawing cats
(Via: Icanttellyoubutiknowitsmine)